The ray model for light can also account for the images created by curved mirrors, by treating each location on a mirror as locally flat. For certain mirror shapes, you can derive mathematical rules for determining the location of the image.
If a section of a curved mirror is parabolic, all incoming rays parallel to the principal axis will be reflected to or appear to originate from the focal point. Spherical mirrors are approximately parabolic for parallel rays that strike the mirror close to the intersection of the axis and the mirror.
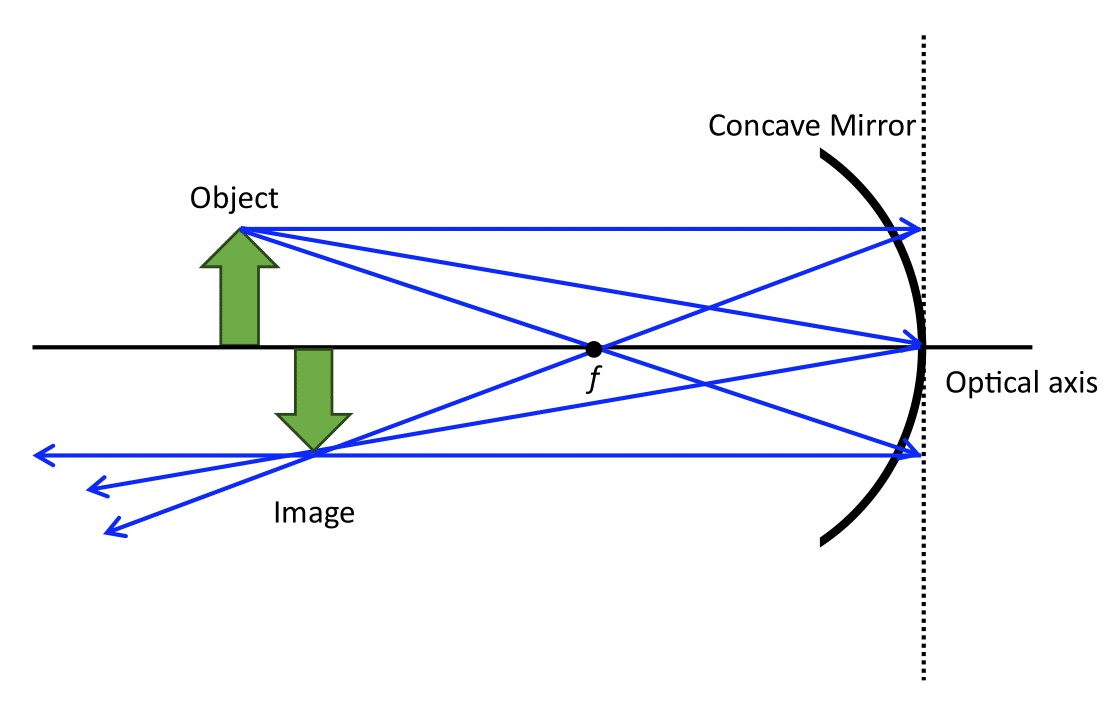
Where the three rays intersect is where the top of the image is located. As established previously, the image distance is negative for virtual images and positive for real images. Once you have found the image using principal rays, the image location may be determined using the geometry.
The Mirror Equation is defined as \(\frac{1}{d_o} + \frac{1}{d_i} = \frac{1}{f}\text{,}\) where \(d_o\) is the object distance, \(d_i\) is the image distance, and \(f\) is the focal length of the mirror.
By considering similar triangles in the figure above, the height of the image can be determined in terms of the height of the object, giving the magnification achieved by the mirror for a given object.
Determine the image location by looking for a point where all three reflected rays appear to converge. Does it appear that this image is real or virtual?
Measure the position of the the object and the image and use them to find a magnification. Is it positive or negative? Is it greater than or smaller than 1?
Substitute your image and object distances into the Mirror Equation and use them to determine the focal length of the mirror. Measure the focal length on your diagram and see if it agrees with your calculation. What do you think the sign of the focal length tells you?
Check the following ray diagram and compare it with your own. How did you do? If you made any mistakes, list them and indicate how you need to change your rays in order to produce the correct image.
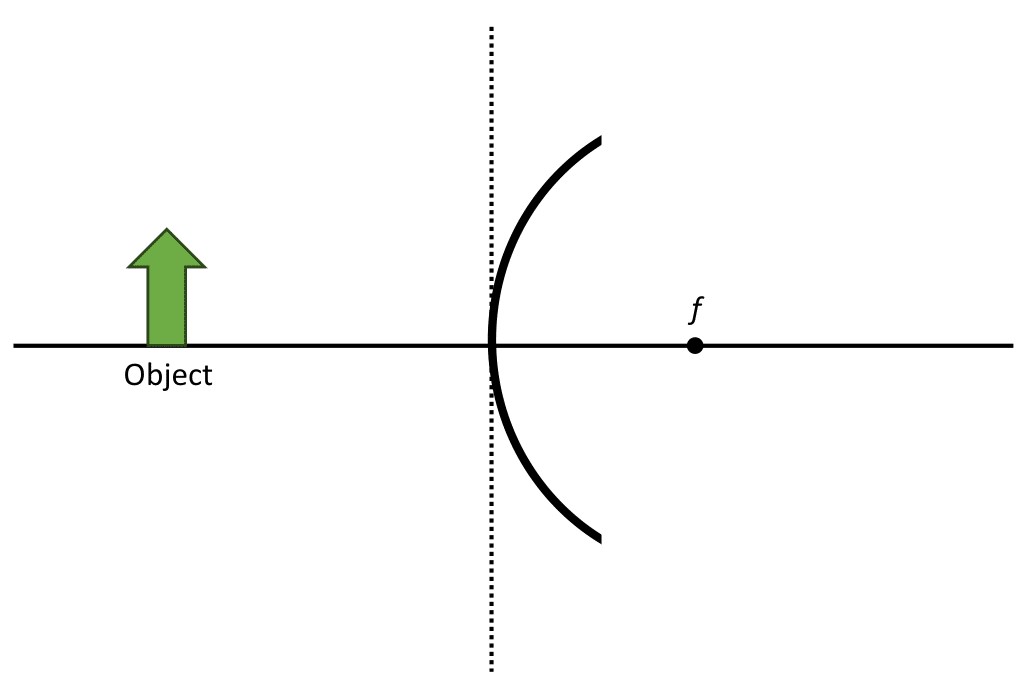
Figure11.7.8.Diagram of a convex mirror. An image is produced by extending the reflected rays into the mirror. There are at least two useful rays to draw. The first is parallel to the optical axis, and the reflected ray will extend back through the focal point of the mirror on the opposite side. The second is reflected at the vertex of the mirror, along the optical axis. The reflected ray is reflected at the incidence angle, and when extended backwards, will intersect with the first ray. The intersection point shows where the top of the object is.
From the drop down menu, select the “arrow” object. Move the object around. How does the image change as you move the object from the left side of the screen, towards the focal point, and past the focal point?
What happens to the image around the focal point? Pick three locations before, near or on, and after the focal point and describe what happens to the image.
A 20 cm tall object is placed at a distance of 200 cm in front of a concave mirror with a radius of curvature of 150 cm. Where is the image located? How does the height of the image change, if at all?
An object is placed 40 cm in front of a concave mirror and its virtual image is at a distance of 60 cm. What is the radius of curvature for this mirror?